
Have you ever shipped an API that “worked on dev” but mysteriously failed in prod because of a clock skew, a mistyped issuer, or a token that never actually expired? If yes, this post will save your next release.
Why this guide?
JWT (JSON Web Token) is the go‑to for stateless authentication in .NET. But “just add JWT” can turn into a tangle of leaky lifetimes, broken validation, and insecure refresh flows. In this hands‑on guide, you’ll:
- Generate JWTs in C# (HS256 and RS256)
- Validate them with robust
TokenValidationParameters - Wire JWT bearer auth into ASP.NET Core minimal APIs
- Implement a secure refresh‑token rotation strategy
- Avoid common pitfalls (clock skew, algorithm confusion, claims mapping, replay, CSRF)
Everything here is production‑oriented and battle‑tested.
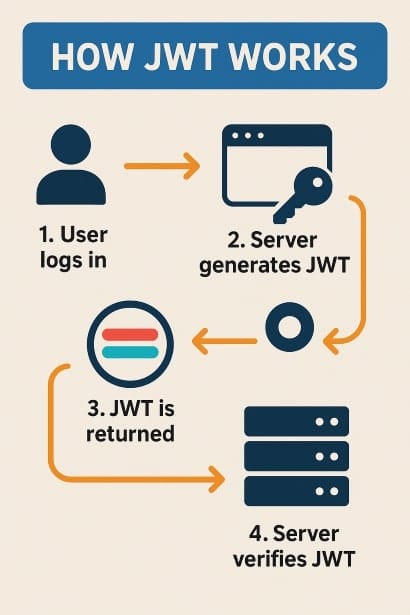
Quick JWT refresher (30 seconds)
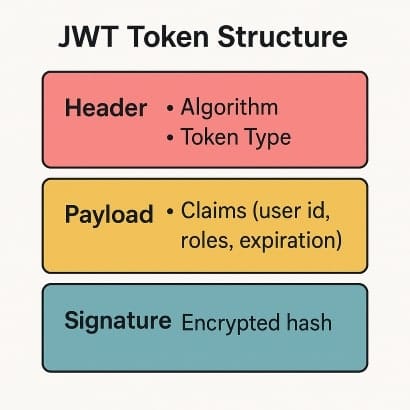
A JWT is three base64url‑encoded parts: header (algorithm, type), payload (claims like sub, exp), and signature. You pass the token as Authorization: Bearer <token>.
HEADER:  { "alg": "RS256", "typ": "JWT" }
PAYLOAD: { "sub": "123", "name": "Alice", "role": "Admin", "exp": 1720000000 }
SIGNATURE: HMAC or RSA over header.payload
Token flow (ASCII diagram)
[Client] --credentials--> [Login API]
[Login API] --JWT+Refresh--> [Client]
[Client] --Bearer JWT--> [Protected API]
[JWT expired] -> [Client] --Refresh token--> [Refresh API] --New JWT(+rotated refresh)--> [Client]
Project setup (ASP.NET Core 8 minimal API)
Create a new API:
dotnet new webapi -n JwtPlayground -f net8.0
cd JwtPlayground
Add packages (most come by default in Microsoft.AspNetCore.App):
dotnet add package Microsoft.AspNetCore.Authentication.JwtBearer
We’ll store settings in appsettings.json:
{
  "Jwt": {
    "Issuer": "https://auth.my-api.local",
    "Audience": "my-api-audience",
    "AccessTokenMinutes": 15,
    "RefreshTokenDays": 14,
    "Alg": "RS256" // or HS256
  }
}
Tip: In production, keep secrets (keys) outside
appsettings.json. Use environment variables, Azure Key Vault, AWS KMS, or HashiCorp Vault.
Option A – HS256 (symmetric) signing
Good for small services if you can strictly control a long, random secret (min 32 bytes). Simpler, but any service that validates can also sign – so guard the secret tightly.
Configure a strong secret
Provide via environment variable, e.g., JWT__SymmetricKey (note double underscore):
$env:JWT__SymmetricKey = [System.Convert]::ToBase64String([System.Security.Cryptography.RandomNumberGenerator]::GetBytes(64))
Token service (HS256)
Create Auth/JwtTokenService.cs:
using System.IdentityModel.Tokens.Jwt;
using System.Security.Claims;
using System.Text;
using Microsoft.Extensions.Options;
using Microsoft.IdentityModel.Tokens;

public sealed class JwtOptions
{
    public string Issuer { get; init; } = string.Empty;
    public string Audience { get; init; } = string.Empty;
    public int AccessTokenMinutes { get; init; } = 15;
    public int RefreshTokenDays { get; init; } = 14;
    public string Alg { get; init; } = "HS256";
    public string? SymmetricKey { get; init; } // base64
}

public interface IJwtTokenService
{
    (string accessToken, DateTimeOffset expires) CreateAccessToken(string userId, string userName, IEnumerable<string> roles, IDictionary<string, string>? custom = null);
    (string refreshToken, DateTimeOffset expires, string id) CreateRefreshToken(string userId);
}

public sealed class HmacJwtTokenService : IJwtTokenService
{
    private readonly JwtOptions _opt;
    private readonly byte[] _keyBytes;
    private readonly JwtSecurityTokenHandler _handler = new();
    private readonly SigningCredentials _creds;

    public HmacJwtTokenService(IOptions<JwtOptions> opt)
    {
        _opt = opt.Value;
        if (string.IsNullOrWhiteSpace(_opt.SymmetricKey))
            throw new InvalidOperationException("Missing HS256 secret (Jwt:SymmetricKey)");

        _keyBytes = Convert.FromBase64String(_opt.SymmetricKey!);
        var key = new SymmetricSecurityKey(_keyBytes);
        _creds = new SigningCredentials(key, SecurityAlgorithms.HmacSha256);
    }

    public (string accessToken, DateTimeOffset expires) CreateAccessToken(string userId, string userName, IEnumerable<string> roles, IDictionary<string, string>? custom = null)
    {
        var now = DateTimeOffset.UtcNow;
        var claims = new List<Claim>
        {
            new(JwtRegisteredClaimNames.Sub, userId),
            new(JwtRegisteredClaimNames.UniqueName, userName),
            new(JwtRegisteredClaimNames.Jti, Guid.NewGuid().ToString("N"))
        };
        foreach (var r in roles) claims.Add(new Claim(ClaimTypes.Role, r));
        if (custom != null) foreach (var kv in custom) claims.Add(new Claim(kv.Key, kv.Value));

        var token = new JwtSecurityToken(
            issuer: _opt.Issuer,
            audience: _opt.Audience,
            claims: claims,
            notBefore: now.UtcDateTime,
            expires: now.AddMinutes(_opt.AccessTokenMinutes).UtcDateTime,
            signingCredentials: _creds
        );

        var jwt = _handler.WriteToken(token);
        return (jwt, token.ValidTo);
    }

    public (string refreshToken, DateTimeOffset expires, string id) CreateRefreshToken(string userId)
    {
        var id = Guid.NewGuid().ToString("N");
        // 64 random bytes, base64url — store only a hash server-side
        var raw = RandomNumberGenerator.GetBytes(64);
        var token = Base64UrlEncoder.Encode(raw);
        var exp = DateTimeOffset.UtcNow.AddDays(_opt.RefreshTokenDays);
        return (token, exp, id);
    }
}
Register in Program.cs:
var builder = WebApplication.CreateBuilder(args);

builder.Services.Configure<JwtOptions>(builder.Configuration.GetSection("Jwt"));

// Choose HS256 service when Alg == HS256
if (builder.Configuration["Jwt:Alg"]?.Equals("HS256", StringComparison.OrdinalIgnoreCase) == true)
    builder.Services.AddSingleton<IJwtTokenService, HmacJwtTokenService>();

builder.Services.AddAuthentication(options =>
{
    options.DefaultAuthenticateScheme = JwtBearerDefaults.AuthenticationScheme;
    options.DefaultChallengeScheme = JwtBearerDefaults.AuthenticationScheme;
})
.AddJwtBearer(options =>
{
    var jwt = builder.Configuration.GetSection("Jwt").Get<JwtOptions>()!;
    var keyBytes = Convert.FromBase64String(jwt.SymmetricKey!);
    options.TokenValidationParameters = new TokenValidationParameters
    {
        ValidateIssuer = true,
        ValidIssuer = jwt.Issuer,

        ValidateAudience = true,
        ValidAudience = jwt.Audience,

        ValidateIssuerSigningKey = true,
        IssuerSigningKey = new SymmetricSecurityKey(keyBytes),

        RequireSignedTokens = true,
        RequireExpirationTime = true,
        ValidateLifetime = true,
        ClockSkew = TimeSpan.FromSeconds(30), // keep tight

        RoleClaimType = ClaimTypes.Role,
        NameClaimType = JwtRegisteredClaimNames.UniqueName,

        ValidAlgorithms = new[] { SecurityAlgorithms.HmacSha256 }
    };

    // Optional: token from cookie fallback
    options.Events = new JwtBearerEvents
    {
        OnMessageReceived = ctx =>
        {
            if (string.IsNullOrEmpty(ctx.Token) && ctx.Request.Cookies.TryGetValue("access_token", out var cookie))
            {
                ctx.Token = cookie;
            }
            return Task.CompletedTask;
        }
    };
});

builder.Services.AddAuthorization();

var app = builder.Build();
app.UseAuthentication();
app.UseAuthorization();
Option B – RS256 (asymmetric) signing
Recommended for distributed systems: only the issuer holds the private key, validators use the public key. Safer key distribution and easy key rollover.
Load RSA keys (PEM)
Put PEM paths in configuration (or use Key Vault). Example loader:
using System.Security.Cryptography;
using Microsoft.Extensions.Options;
using Microsoft.IdentityModel.Tokens;

public sealed class RsaJwtTokenService : IJwtTokenService
{
    private readonly JwtOptions _opt;
    private readonly SigningCredentials _creds;
    private readonly JwtSecurityTokenHandler _handler = new();
    private readonly RsaSecurityKey _publicKey;

    public RsaJwtTokenService(IOptions<JwtOptions> opt, IWebHostEnvironment env)
    {
        _opt = opt.Value;
        // Example: keys loaded from files pointed by env vars for brevity
        var privatePem = File.ReadAllText(Path.Combine(env.ContentRootPath, "keys", "rsa_private.pem"));
        var publicPem  = File.ReadAllText(Path.Combine(env.ContentRootPath, "keys", "rsa_public.pem"));

        using var rsaPriv = RSA.Create();
        rsaPriv.ImportFromPem(privatePem);
        var rsaKey = new RsaSecurityKey(rsaPriv) { KeyId = Guid.NewGuid().ToString("N") };
        _creds = new SigningCredentials(rsaKey, SecurityAlgorithms.RsaSha256);

        using var rsaPub = RSA.Create();
        rsaPub.ImportFromPem(publicPem);
        _publicKey = new RsaSecurityKey(rsaPub);
    }

    public (string accessToken, DateTimeOffset expires) CreateAccessToken(string userId, string userName, IEnumerable<string> roles, IDictionary<string, string>? custom = null)
    {
        var now = DateTimeOffset.UtcNow;
        var claims = new List<Claim>
        {
            new(JwtRegisteredClaimNames.Sub, userId),
            new(JwtRegisteredClaimNames.UniqueName, userName),
            new(JwtRegisteredClaimNames.Jti, Guid.NewGuid().ToString("N"))
        };
        foreach (var r in roles) claims.Add(new Claim(ClaimTypes.Role, r));
        if (custom != null) foreach (var kv in custom) claims.Add(new Claim(kv.Key, kv.Value));

        var token = new JwtSecurityToken(
            issuer: _opt.Issuer,
            audience: _opt.Audience,
            claims: claims,
            notBefore: now.UtcDateTime,
            expires: now.AddMinutes(_opt.AccessTokenMinutes).UtcDateTime,
            signingCredentials: _creds
        );
        return (new JwtSecurityTokenHandler().WriteToken(token), token.ValidTo);
    }

    public (string refreshToken, DateTimeOffset expires, string id) CreateRefreshToken(string userId)
    {
        var id = Guid.NewGuid().ToString("N");
        var raw = RandomNumberGenerator.GetBytes(64);
        var token = Base64UrlEncoder.Encode(raw);
        var exp = DateTimeOffset.UtcNow.AddDays(_opt.RefreshTokenDays);
        return (token, exp, id);
    }

    public SecurityKey PublicKey() => _publicKey;
}
Configure validation with the public key:
if (builder.Configuration["Jwt:Alg"]?.Equals("RS256", StringComparison.OrdinalIgnoreCase) == true)
    builder.Services.AddSingleton<IJwtTokenService, RsaJwtTokenService>();

builder.Services.AddAuthentication(JwtBearerDefaults.AuthenticationScheme)
    .AddJwtBearer(o =>
    {
        var sp = builder.Services.BuildServiceProvider();
        var jwt = sp.GetRequiredService<IOptions<JwtOptions>>().Value;
        var rsa = (RsaJwtTokenService)sp.GetRequiredService<IJwtTokenService>();

        o.TokenValidationParameters = new TokenValidationParameters
        {
            ValidateIssuer = true,
            ValidIssuer = jwt.Issuer,
            ValidateAudience = true,
            ValidAudience = jwt.Audience,
            ValidateIssuerSigningKey = true,
            IssuerSigningKey = rsa.PublicKey(),
            RequireSignedTokens = true,
            RequireExpirationTime = true,
            ValidateLifetime = true,
            ClockSkew = TimeSpan.FromSeconds(30),
            RoleClaimType = ClaimTypes.Role,
            NameClaimType = JwtRegisteredClaimNames.UniqueName,
            ValidAlgorithms = new[] { SecurityAlgorithms.RsaSha256 }
        };
    });
Key rollover: publish new public key (kid changes), sign with new private key, accept both
kids during transition.
Minimal API endpoints
Add some sample endpoints in Program.cs:
app.MapPost("/login", (IJwtTokenService tokens) =>
{
    // TODO: validate credentials. Hardcoded demo user:
    var userId = "42"; var userName = "alice"; var roles = new[] { "Admin" };

    var (access, atExp) = tokens.CreateAccessToken(userId, userName, roles, new Dictionary<string,string> {
        ["tenant"] = "contoso"
    });
    var (refresh, rtExp, refreshId) = tokens.CreateRefreshToken(userId);

    // In real app: store hashed refresh token with (refreshId, userId, exp, family, used=false)

    return Results.Ok(new
    {
        access_token = access,
        access_expires = atExp,
        refresh_token = refresh,
        refresh_id = refreshId,
        refresh_expires = rtExp
    });
});

app.MapPost("/refresh", async (HttpContext ctx) =>
{
    // Expect { refresh_token, refresh_id } body
    var input = await ctx.Request.ReadFromJsonAsync<RefreshInput>();
    if (input is null) return Results.BadRequest();

    // 1) Look up refreshId in DB, compare hashed token, check exp & not used
    // 2) Mark old refresh as used (to prevent replay)
    // 3) Issue new access + rotated refresh (new id & token)

    return Results.Ok(new { /* new tokens */ });
});

app.MapGet("/me", (ClaimsPrincipal user) =>
{
    return Results.Ok(new
    {
        name = user.Identity?.Name,
        roles = user.Claims.Where(c => c.Type == ClaimTypes.Role).Select(c => c.Value),
        tenant = user.FindFirst("tenant")?.Value
    });
}).RequireAuthorization();

public record RefreshInput(string refresh_token, string refresh_id);

app.Run();
Swagger/OpenAPI with Bearer support
Add Swagger definition for JWT so testers can try endpoints easily:
builder.Services.AddEndpointsApiExplorer();
builder.Services.AddSwaggerGen(c =>
{
    c.SwaggerDoc("v1", new() { Title = "JwtPlayground", Version = "v1" });
    var scheme = new Microsoft.OpenApi.Models.OpenApiSecurityScheme
    {
        Name = "Authorization",
        Type = Microsoft.OpenApi.Models.SecuritySchemeType.Http,
        Scheme = "bearer",
        BearerFormat = "JWT",
        In = Microsoft.OpenApi.Models.ParameterLocation.Header,
        Description = "Enter 'Bearer {token}'"
    };
    c.AddSecurityDefinition("Bearer", scheme);
    c.AddSecurityRequirement(new()
    {
        [ scheme ] = Array.Empty<string>()
    });
});

var app = builder.Build();
if (app.Environment.IsDevelopment())
{
    app.UseSwagger();
    app.UseSwaggerUI();
}
Validation hardening checklist
Make these non‑negotiable in production:
- ✅
ValidateIssuer = true,ValidateAudience = true,ValidateIssuerSigningKey = true,ValidateLifetime = true - ✅ Use short access tokens (5-20 minutes). Use refresh tokens for continuity.
- ✅
ClockSkew≤ 60 seconds; don’t default to 5 minutes. - ✅
RequireSignedTokens = trueand setValidAlgorithmsto an allow‑list. - ✅ Configure
NameClaimTypeandRoleClaimTypeexplicitly (avoid surprise claim mapping). - ✅ Clear legacy inbound mapping:
JwtSecurityTokenHandler.DefaultInboundClaimTypeMap.Clear(); - ✅ Asymmetric RS256 preferred when multiple services validate tokens.
- ✅ Enforce
kidon keys; keep a JWKs endpoint or config for rotation. - ✅ Use HTTPS only; never transmit tokens over HTTP.
- ✅ Implement token replay defense (see below).
Refresh tokens & rotation (safe pattern)
A robust approach I’ve used in production:
- On login, issue access token (short TTL) + refresh token (long TTL) and persist hashed refresh token with metadata:
refreshId(GUID),userId,hash,expiresAt,familyId,used=false,revoked=false.
- On refresh:
- Lookup by
refreshId; verify not expired, not used, not revoked. - Compare hash(refresh_token) (constant‑time).
- Mark current refresh as
used=true. - Issue new access token and a rotated refresh token with new
refreshId, samefamilyId. - Persist new hashed refresh.
- Lookup by
- If a used token appears again → revoke the entire family (suspected theft).
Example storage entity (EF Core)
public class RefreshTokenEntity
{
    public string RefreshId { get; set; } = default!;
    public string UserId { get; set; } = default!;
    public string FamilyId { get; set; } = default!;
    public string Hash { get; set; } = default!;
    public DateTimeOffset ExpiresAt { get; set; }
    public bool Used { get; set; }
    public bool Revoked { get; set; }
}
Hash helper
public static class RefreshTokenHash
{
    public static string Compute(string token)
    {
        using var sha = SHA256.Create();
        var bytes = sha.ComputeHash(Encoding.UTF8.GetBytes(token));
        return Convert.ToHexString(bytes);
    }
}
Token replay & blacklist (optional but useful)
If you need immediate revocation (e.g., user changed password), maintain a token replay cache:
- On issuing access tokens, store the
jtiin a distributed cache (Redis) with TTL = token lifetime. - On validation, in
OnTokenValidated, checkjtiexistence and status. - On logout/revoke, delete or mark
jtias revoked.
options.Events = new JwtBearerEvents
{
    OnTokenValidated = async ctx =>
    {
        var jti = ctx.Principal?.FindFirst(JwtRegisteredClaimNames.Jti)?.Value;
        var cache = ctx.HttpContext.RequestServices.GetRequiredService<IDistributedCache>();
        if (!string.IsNullOrEmpty(jti))
        {
            var state = await cache.GetStringAsync($"jti:{jti}");
            if (state == "revoked")
            {
                ctx.Fail("Token revoked");
            }
        }
    }
};
Note: Blacklisting access tokens reduces statelessness; use only when you truly need immediate revocation.
Cookies vs Authorization header
- Bearer header: simplest for APIs; vulnerable to XSS if you store tokens in
localStorage. Prefer in‑memory storage in SPA. - Cookie: set
HttpOnly,Secure,SameSite=Strict|Lax(orNonefor cross‑site with HTTPS). If you use cookies for auth, you must add CSRF protection (anti‑forgery token, double submit, or SameSite discipline).
Example cookie response:
app.MapPost("/login-cookie", (IJwtTokenService tokens, HttpResponse res) =>
{
    var (access, atExp) = tokens.CreateAccessToken("42", "alice", new[]{"Admin"});
    res.Cookies.Append("access_token", access, new CookieOptions
    {
        HttpOnly = true,
        Secure = true,
        SameSite = SameSiteMode.Strict,
        Expires = atExp
    });
    return Results.Ok();
});
Claims & authorization policies
Stick to a small, predictable claim set. Recommended:
sub(user id),jti,iat,exp,nbfname/unique_name,role- Custom:
tenant,permissions(array) if needed
Define policies once:
builder.Services.AddAuthorization(options =>
{
    options.AddPolicy("AdminOnly", p => p.RequireRole("Admin"));
    options.AddPolicy("TenantScoped", p => p.RequireClaim("tenant"));
});

app.MapGet("/admin/metrics", () => Results.Ok()).RequireAuthorization("AdminOnly");
Testing tokens (unit tests)
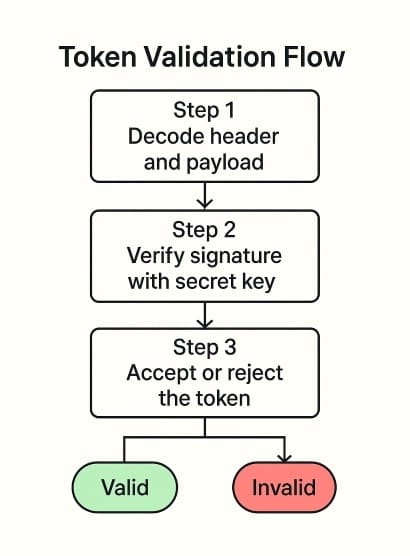
Use JwtSecurityTokenHandler.ValidateToken with TokenValidationParameters to assert behavior.
[Fact]
public void Expired_token_is_rejected()
{
    var h = new JwtSecurityTokenHandler();
    var key = new SymmetricSecurityKey(RandomNumberGenerator.GetBytes(64));
    var creds = new SigningCredentials(key, SecurityAlgorithms.HmacSha256);

    var now = DateTime.UtcNow;
    var token = new JwtSecurityToken(
        issuer: "i", audience: "a",
        expires: now.AddSeconds(-5), notBefore: now.AddMinutes(-1),
        signingCredentials: creds);

    var jwt = h.WriteToken(token);

    var p = new TokenValidationParameters
    {
        ValidateIssuer = true, ValidIssuer = "i",
        ValidateAudience = true, ValidAudience = "a",
        ValidateIssuerSigningKey = true, IssuerSigningKey = key,
        ValidateLifetime = true, ClockSkew = TimeSpan.Zero
    };

    Assert.ThrowsAny<SecurityTokenException>(() => h.ValidateToken(jwt, p, out _));
}
Performance tips
- Reuse
SigningCredentialsandTokenValidationParameters(already done in services) to avoid allocations. - Keep tokens small (avoid dumping profiles into claims). Use an ID and query the rest.
- For high‑throughput gateways, prefer hardware‑accelerated RSA/ECDSA providers or cached JWKs.
Common pitfalls (and fixes)
- Long access token lifetime → set 5-20 minutes; rely on refresh.
- Huge clock skew → cap at 30-60 seconds; ensure NTP sync on servers.
- Missing audience/issuer → always validate both.
- Accept‑any algorithm → set
ValidAlgorithms. - Implicit claim mapping surprises → clear default map and set
NameClaimType/RoleClaimType. - Storing raw refresh tokens → always hash at rest.
- No rotation → rotate refresh tokens; revoke family on replay.
- Tokens in
localStorage→ prefer in‑memory orHttpOnlycookies + CSRF defense.
Full minimal example (Program.cs condensed)
For clarity; adjust to your chosen HS256/RS256 service.
var builder = WebApplication.CreateBuilder(args);

builder.Services.Configure<JwtOptions>(builder.Configuration.GetSection("Jwt"));
if (builder.Configuration["Jwt:Alg"] == "HS256")
    builder.Services.AddSingleton<IJwtTokenService, HmacJwtTokenService>();
else
    builder.Services.AddSingleton<IJwtTokenService, RsaJwtTokenService>();

builder.Services.AddAuthentication(JwtBearerDefaults.AuthenticationScheme)
    .AddJwtBearer(o =>
    {
        var sp = builder.Services.BuildServiceProvider();
        var jwt = sp.GetRequiredService<IOptions<JwtOptions>>().Value;
        SecurityKey key;
        string[] algs;
        if (jwt.Alg.Equals("HS256", StringComparison.OrdinalIgnoreCase))
        {
            key = new SymmetricSecurityKey(Convert.FromBase64String(jwt.SymmetricKey!));
            algs = new[] { SecurityAlgorithms.HmacSha256 };
        }
        else
        {
            var rsa = (RsaJwtTokenService)sp.GetRequiredService<IJwtTokenService>();
            key = rsa.PublicKey();
            algs = new[] { SecurityAlgorithms.RsaSha256 };
        }
        o.TokenValidationParameters = new TokenValidationParameters
        {
            ValidateIssuer = true, ValidIssuer = jwt.Issuer,
            ValidateAudience = true, ValidAudience = jwt.Audience,
            ValidateIssuerSigningKey = true, IssuerSigningKey = key,
            RequireSignedTokens = true,
            RequireExpirationTime = true,
            ValidateLifetime = true,
            ClockSkew = TimeSpan.FromSeconds(30),
            RoleClaimType = ClaimTypes.Role,
            NameClaimType = JwtRegisteredClaimNames.UniqueName,
            ValidAlgorithms = algs
        };
    });

builder.Services.AddAuthorization();
var app = builder.Build();
app.UseAuthentication();
app.UseAuthorization();

app.MapPost("/login", (IJwtTokenService tokens) =>
{
    var (access, atExp) = tokens.CreateAccessToken("42", "alice", new[]{"Admin"});
    var (refresh, rtExp, refreshId) = tokens.CreateRefreshToken("42");
    return Results.Ok(new { access, atExp, refresh, rtExp, refreshId });
});

app.MapGet("/secret", () => Results.Ok("shh"))
   .RequireAuthorization();

app.Run();
FAQ: JWT in .NET – practical answers
RS256 for multi‑service ecosystems (safer distribution, easy rotation). HS256 is fine for single‑service apps if you guard the secret.
Server‑side DB as hashes with metadata. Client stores only the opaque refresh string.
Use a replay cache / blacklist keyed by jti or revoke refresh token family. Blacklisting access tokens trades statelessness for control.
5-20 minutes for access tokens; 7-30 days for refresh tokens (business‑dependent). Keep ClockSkew ≤ 60s.
Prefer coarse roles in tokens; fetch fine‑grained permissions from your backend to avoid frequent token bloat/rotation.
aud and iss?Yes. Validate both to avoid token confusion across services/environments.
Keep tokens in memory, not localStorage. Or use HttpOnly cookies + CSRF defense for a cookie‑based flow.
Conclusion: Ship JWT with confidence
JWTs are easy to get “working” and easier to get wrong. With short‑lived access tokens, rotated refresh tokens, strict validation, and sane key management, you’ll have a secure, maintainable auth foundation. Try the minimal example, then harden it with the checklist above. Have a trick or a horror story from production? Drop it in the comments – let’s learn from each other.